Contents
- Introduction
- Packages
- Image I/O
- Video I/O
- Display Images
- Changing Colorspace
- Resizing Images
- Blur Images
- Rotate Rmages
Introduction
Packages
last update: October 2018
This list contains only packages that work with Julia 1.0.
- JuliaImages is a julia organization that hosts and maintains some important packages for image processing.
- ImageCore.jl
- ImageCore.jl is the basis for almost all image related packages. It provides basic definition of what an image is and how colorspaces are defined.
- Images.jl
- Images.jl provides basic functions for image processing.
- TestImages.jl
- TestImages.jl provides a set of standard test images for Images.jl.
- ImageView.jl
- ImageView.jl provides functions to view images in separate windows. To get an idea of what ImageView.jl is capable of, it is useful to test the package after installation (
(v1.0) pkg> test ImageView).
- ImageView.jl provides functions to view images in separate windows. To get an idea of what ImageView.jl is capable of, it is useful to test the package after installation (
- ImageInTerminal.jl
- ImageInTerminal.jl provides functions to draw images in a terminal.
- ImageDraw.jl
- ImageDraw.jl provides functions to draw on images (e.g. circles, lines)
- ImageFeatures.jl
- ImageFeatures.jl provides functions such as BRIEF, ORB, BRISK, FREAK, HOG for detecting features in images.
- ImageSegmentation.jl
- ImageSegmentation.jl provides several functions of classical (non-deep learning) for image segmentation.
- ImageDistances.jl
- ImageDistances.jl provides functions for distance measurements (e.g. the Hausdorff).
- ImageFiltering.jl
- ImageFiltering.jl provides various filter functions for images.
- ImageMetadata.jl
- ImageMetadata.jl provides functions to handle metadata (e.g. for MRI scans).
- ImageInpainting.jl
- ImageInpainting.jl provides functions for region filling and object removal.
- ImageShow.jl
- ImageShow.jl provides functions to display images in graphical environments (e.g. IJulia).
- ImageAxes.jl
- ImageAxes provides functions to assign “meaning” to axes in arrays such as different spatial resolution in different directions of an image.
- ImageMorphology.jl
- ImageMorphology.jl provides functions for morphological image analysis and manipulation.
- ImageTransformations.jl
- ImageTransformations.jl provides functions for transforming images (resizing, rotation, etc.).
- ImageCore.jl
- VideoIO.jl
-
VideoIO.jl provides access to ffmpeg and therefore allows loading of video files and streams (e.g. webcam)
-
deprecated/not available via package manager
- ImageTracking.jl
- ImageTracking.jl provides functions of object tracking with cameras. It looks deprecated.
- CameraGeometry.jl
- CameraGeometry.jl is supposed to perform projective transformations, camera lense corrections and 3D reconstructions. It looks like nothing was ever implemented.
- Tinker.jl
- Tinker.jl is supposed to provide ImageJ-like image analysis.
- ImageCl.jl
- ImageCl should speed-up image processing by using OpenCL. The package seems to be deprecated.
- OpenCV.jl
- OpenCV.jl is a wrapper to call openCV functions. It looks like it has been discontinued.
- ImageTracking.jl
-
Image I/O
A popular approach to teaching image processing with Julia is to use the TestImages packages. That would like this:
ImageFromTestImages = TestImages.testimage("lighthouse")
If we want to open our own images, then we would have to use:
ImageFromFile = Images.load("Path/Image.ext")
Images.load supports:
?Images.load
load(filename)loads the contents of a formatted file, trying to infer
the format fromfilenameand/or magic bytes in the file.load(strm)loads from anIOStreamor similar object. In this case,
there is no filename extension, so we rely on the magic bytes for format identification.load(File(format"PNG", filename))specifies the format directly, and bypasses inference.load(Stream(format"PNG", io))specifies the format directly, and bypasses inference.load(f; options...)passes keyword arguments on to the loader.
Video I/O
VideoIO.jl is basically a wrapper for ffmpeg. First, we have to install it:
(v1.0) pkg>  add VideoIO


# check if everything has worked
import VideoIO

julia> VideoIO. #press TAB

AVCodecs               EightBitTypes           VideoReader             _read_packet            avutil_dir              fieldposition           have_decoded_frame      libavutil               read
AVDevice               Makie                   VideoTranscodeContext   _swscale_version        bufsize_check           get_camera_devices      have_frame              libpath                 read!
AVDict                 NO_TRANSCODE            __init__                av_load_path            check_deps              get_duration            have_swscale            libswscale              read_packet
AVFormat               PermutedArray           _avcodec_version        av_pointer_to_field     decode_packet           get_start_time          include                 open                    reset_frame_flag!
AVInput                SWScale                 _avdevice_version       av_setfield             depsjl_path             get_time_duration       init_camera_devices     open_avinput            retrieve
AVUtil                 StreamContext           _avfilter_version       av_version              eval                    have_avcodec            init_camera_settings    opencamera              retrieve!
CAMERA_DEVICES         StreamInfo              _avformat_version       avcodec_dir             execoutput              have_avdevice           libavcodec              openvideo               seconds_to_timestamp
DEFAULT_CAMERA_DEVICE  TRANSCODE               _avutil_version         avdevice_dir            ffmpeg                  have_avfilter           libavdevice             play                    swscale_dir
DEFAULT_CAMERA_FORMAT  TestVideos              _close                  avfilter_dir            ffmpeg_or_libav         have_avformat           libavfilter             playvideo               versioninfo
DEFAULT_CAMERA_OPTIONS VidArray                _get_fc                 avformat_dir            ffprobe                 have_avutil             libavformat             pump                    viewcam
If we want to use display a video stream (no audio) using VideoIO, then we have to install and import Makie.jl. VideoIO provides a few example videos. We can list them using VideoIO.TestVideos.available():
julia> VideoIO.TestVideos.available()
VideoFile:
   name:         annie_oakley.ogg  (Downloaded)
   description:  The "Little Sure Shot" of the "Wild West," exhibition of rifle shooting at glass balls.
   license:      pubic_domain (US)
   credit:
   source:       https://commons.wikimedia.org/wiki/File:Annie_Oakley_shooting_glass_balls,_1894.ogg
   download_url: https://upload.wikimedia.org/wikipedia/commons/8/87/Annie_Oakley_shooting_glass_balls%2C_1894.ogv

VideoFile:
   name:         crescent-moon.ogv
   description:  Moonset (time-lapse).
   license:      Creative Commons Attribution 2.0 Generic (http://creativecommons.org/licenses/by/2.0/deed)
   credit:       Photo : Thomas Bresson
   source:       https://commons.wikimedia.org/wiki/File:2010-10-10-Lune.ogv
   download_url: https://upload.wikimedia.org/wikipedia/commons/e/ef/2010-10-10-Lune.ogv

VideoFile:
   name:         ladybird.mp4
   description:  Ladybird opening wings (slow motion)
   license:      Creative Commons: By Attribution 3.0 Unported (http://creativecommons.org/licenses/by/3.0/deed)
   credit:       CC-BY NatureClip (http://youtube.com/natureclip)
   source:       https://downloadnatureclip.blogspot.com/p/download-links.html
   download_url: https://archive.org/download/LadybirdOpeningWingsCCBYNatureClip/Ladybird%20opening%20wings%20CC-BY%20NatureClip.mp4

VideoFile:
   name:         black_hole.webm
   description:  Artist’s impression of the black hole inside NGC 300 X-1 (ESO 1004c)
   license:      Creative Commons Attribution 3.0 Unported (http://creativecommons.org/licenses/by/3.0/deed)
   credit:       Credit: ESO/L. Calçada
   source:       https://www.eso.org/public/videos/eso1004a/
   download_url: https://upload.wikimedia.org/wikipedia/commons/1/13/Artist%E2%80%99s_impression_of_the_black_hole_inside_NGC_300_X-1_%28ESO_1004c%29.webm
We can either download all test videos using VideoIO.TestVideos.download_all() or choose a single video we want to display which is downloaded if needed (indicated by [...]annie_oakley.ogg (Downloaded)[...] in the list above). To watch an artist impression of a black hole we can run:
julia> import Makie
julia> import VideoIO
julia>
julia> videoFile = VideoIO.TestVideos.testvideo("black_hole") # same as VideIO.testvideo(...)
julia> VideoIO.playvideo(videoFile)
julia> close(videoFile)
Since OpenCV is something like the gold standard in computer vision, it is quite common to use it within the Python ecosystem. A Python script to read a video file and save it after some processing would look like this:
import cv2

def main()
    # ...
    # do some file checks (e.g. check if input file and output path exist etc.
    # ...
    cap = cv2.VideoCapture("filename")
    if cap.isOpened() == False:
        print("Error opening video")
        return
    frameWidth = int(cap.get(cv2.CAP_PROPS_FRAME_WIDTH))
    frameHeight = int(cap.get(cv2.CAP_PROPS_FRAME_HEIGHT))
    FPS = int(cap.get(cv2.CAP_PROPS_FPS))
    out = cv2.VideoWriter("outputFilename", cv2.VideoWriter_fourcc('M','J','P','G'), FPS, (frameWidth, frameHeight))
    ret, frame = cap.read()
    if ret==True:
        # skip or do something with first frame

        while cap.isOpened():
            ret, frame = cap.read()
            if ret == True:
                #frameEdited =  do stuff
                out.write(frameEdited)

     cap.release()
     out.release()
     cv2.destroyAllWindows()

if __name__ == "__main__":
    main()
If we want to build something similar with Julia, then we have to use something like this:
(There could be some better way to do this. Since the documentation of VideoIO.jl is rather poor, I’m quite happy to get at least something working.)
import VideoIO
import Images

function doSomeStuff(frame)
    # do some stuff with the current frame
    return frameEdited
end


function main()
    videoStream = VideoIO.openvideo(filename)
    # webcam: videoStream = VideoIO.opencamera()
    frameCounter::BigInt = 1 #see explanation below
    while !eof(videoStream)
        frame = VideoIO.read(videoStream)
        frameEdited = doSomeStuff(frame)
        Images.save("./frameEdited_$frameCounter.png", frameEdited) # sry for that
        frameCounter += 1;
    close(videoFIle)
end

main()
For some unknown reason the example above does not work using the test video function.
Okay, let’s look at each line of code in detail:
We are importing video I/O capabilities with import VideoIO and import Images. If we import Images, then VideoIO will output each frame as an image array defined by Image. Otherwise, VideoIO will output each frame in some RAW format (haven’t tested this since my intention was to use it similar to OpenCV).
With VideoIO.openvideo(filename) we open the video file directly and make it available as a stream. The while loops as long as the end of file of the stream is reached. This can be tested with eof(videoStream).
What happens inside the loop is pretty straight forward. We read a frame using VideoIO.read. We could initialize img with the first frame before starting the while loop using img=VideoIO.read(videoStream) and update img inside the loop using VideoIO.read!(videoStream, img). Next, we could do some stuff with it. Now comes the tricky part. The simplest way to deal with saving a video stream is dumping each frame as an image using Image.save. It seems like VideoIO could to this using some deep ffmpeg options. However, I was not able to find a efficient solution for this within a reasonable amount of time. It might simply be faster to run ffmpeg afterwards to build a video out of the images. Perhaps OpenCV.jl could help as well.
Bonus feature: Unlike with OpenCV, we can access a defined position in the video using seconds instead of a frame count: VideoIO.seek(videoStream,timeMarker::Float64).
Display Images
Images are displayed within a Jupyter notebook automatically. However, if we want to display it in a separate window, then we can do so by using ImageView:
ImageView.imshow(ImageFromTestImages)
Dict{String,Any} with 4 entries:
  "gui"         => Dict{String,Any}("window"=>GtkWindowLeaf(name="", parent, wi…
  "roi"         => Dict{String,Any}("redraw"=>50: "map(clim-mapped image, input…
  "annotations" => 3: "input-2" = Dict{UInt64,Any}() Dict{UInt64,Any}
  "clim"        => 2: "CLim" = ImageView.CLim{ColorTypes.RGB{Float64}}(RGB{Floa…
The output looks like this:

If we hover over it, then the values of the image that correspond to the mouse position at that time are displayed. We can access them manually as well:
string(ImageFromTestImages[262,349])
"RGB{N0f8}(1.0,1.0,0.835)"
We can see, that Images.jl does not use RGB integer values ranging from 0 - 255 per color channel but RGB floating point values ranging from 0 - 1.0 per color channel.
Changing Colorspace
If we want to change colorspace, then we have to change the colorspace of each cell of an image array. Therefore, we have to use the element-wise operator (.) on the function:
ImageFromTestImagesGray = Images.Gray.(ImageFromTestImages)
This yields:

I wanted to show you some more colorspaces with false colors, however IJulia (or Image.jl) is smart enough to display it as RGB correctly… .
Resizing Images
To reduce complexity and increase computational speed of computer vision applications, we are going to resize images to something smaller. We can use the function imresize. Let’s see how we can use it:
?Images.imresize
imresize(img, sz) -> imgr
imresize(img, inds) -> imgr
imresize(img; ratio) -> imgr
Change img to be of size sz (or to have indices inds). If ratio is used, then sz = ceil(Int, size(img).*ratio). This interpolates the values at sub-pixel locations. If you are shrinking the image, you risk aliasing unless you low-pass filter img first.

Examples
julia> img = testimage("lena_gray_256") # 256*256
julia> imresize(img, 128, 128) # 128*128
julia> imresize(img, 1:128, 1:128) # 128*128
julia> imresize(img, (128, 128)) # 128*128
julia> imresize(img, (1:128, 1:128)) # 128*128
julia> imresize(img, (1:128, )) # 128*256
julia> imresize(img, 128) # 128*256
julia> imresize(img, ratio = 0.5) # 128*128

σ = map((o,n)->0.75*o/n, size(img), sz)
kern = KernelFactors.gaussian(σ)   # from ImageFiltering
imgr = imresize(imfilter(img, kern, NA()), sz)
See also restrict.
First, we should get an idea of the size of our image:
size(ImageFromTestImages)
(512, 768)
Let’s start with the simplest version of shrinking an image:
ImageFromTestImagesShrinked = Images.imresize(ImageFromTestImages, ratio = 0.5)
This outputs:
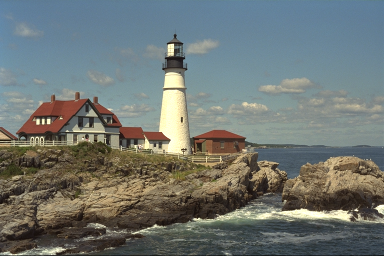
However, the docstring of Images.imresize states:
If you are shrinking the image, you risk aliasing unless you low-pass filter img first.
Blur Images
Blur = 0.1
sz = div.(size(ImageFromTestImages),2)
σ = map((o,n)->Blur*o/n, size(ImageFromTestImages), sz)
kern = ImageFiltering.KernelFactors.gaussian(σ)
Images.imresize(Images.imfilter(ImageFromTestImages, kern, Images.NA()), sz)
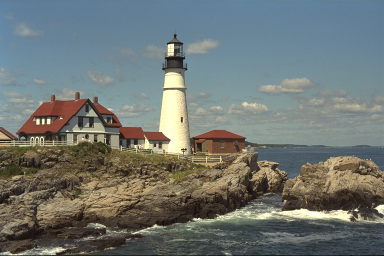
If we increase Blur, then the image gets more blurred.
Blur = 0.5:

Blur = 0.9:

Blur = 5.0:

This is how it looks like if we loop Blur from 0.00 to 5.00 and animate it using :
for i=0:0.01:5
    Blur = i
    sz = div.(size(ImageFromTestImages),2)
    σ = map((o,n)->Blur*o/n, size(ImageFromTestImages), sz)
    kern = ImageFiltering.KernelFactors.gaussian(σ)
    ResizedImage = Images.imresize(Images.imfilter(ImageFromTestImages, kern, Images.NA()), sz)
    Images.save("./Rescale/RescaleBlurEffect_$i.png", ResizedImage)
end
$ ffmpeg -framerate 30 -pattern_type glob -i '*.png' -c:v libx264 -r 30 julia_images_resize.mp4
Image/video annotations are quite a pain compared to OpenCV and I did not want to detour via GLVisualize, hence no blur status is written on the image.
Rotate Images
Another common task is to rotate an image. We can use Images.imrotate for this. Let’s see what functionality it provides:
?Images.imrotate
imrotate(img, θ, [indices], [degree = Linear()], [fill = NaN]) -> imgr
Rotate image img by θ∈[0,2π) in a clockwise direction around its center point. To rotate the image counterclockwise, specify a negative value for angle.

By default, rotated image imgr will not be cropped. Bilinear interpolation will be used and values outside the image are filled with NaN if possible, otherwise with 0.

Examples
julia> img = testimage("cameraman")

# rotate with bilinear interpolation but without cropping
julia> imrotate(img, π/4)

# rotate with bilinear interpolation and with cropping
julia> imrotate(img, π/4, axes(img))

# rotate with nearest interpolation but without cropping
julia> imrotate(img, π/4, Constant())
See also warp.
ImageFromTestImagesRotated = Images.imrotate(ImageFromTestImages, π/2)
This is interesting: imrotate seems not to perform a proper Array transpose. It is clear that it does not use π/2 symbolically but numerically. Hence, we end up with a border around the image.
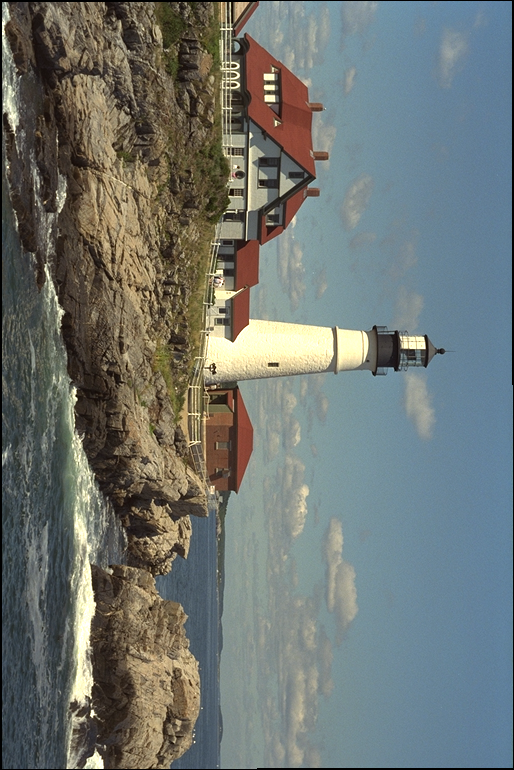
Let’s see how it works with a half rotation:
ImageFromTestImagesRotated = Images.imrotate(ImageFromTestImages, π)
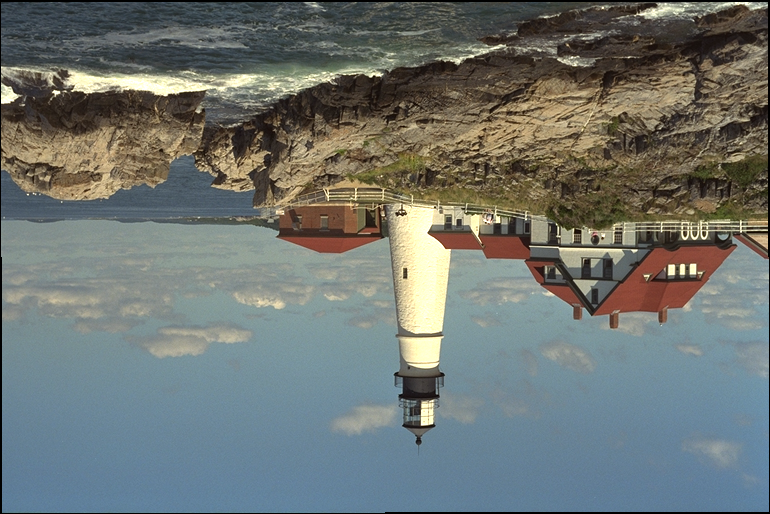
If we want to keep the dimensions of our input image, then we have to use:
ImageFromTestImagesRotated = Images.imrotate(ImageFromTestImages, π/2, axes(ImageFromTestImages))
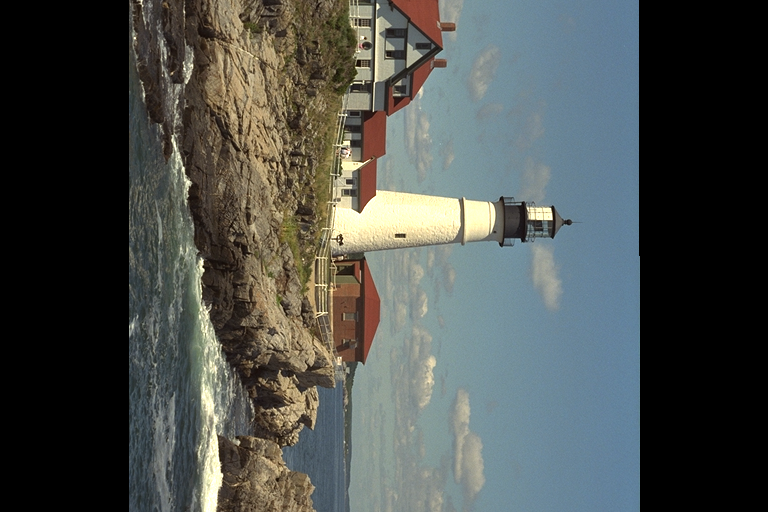
This is how it looks like if we loop the rotation angle from 0 to 2 :
for angle=0:0.001:2
    RotatedImage = Images.imrotate(ImageFromTestImages, π*angle, axes(ImageFromTestImages))
    Images.save("./Rotate/Rotation_$angle.png", RotatedImage)
end
$ ffmpeg -framerate 30 -pattern_type glob -i '*.png' -c:v libx264 -r 30 julia_images_rotate.mp4
Image/video annotations are quite a pain compared to OpenCV and I did not want to detour via GLVisualize, hence no blur status is written on the image.